Quick Start Guide
This guide walks you through setting up Smatyx from scratch. By the end, you'll have a working menu, a configured store, and be ready to take orders.
The setup follows a natural order: create menu items first, organize them into menus, then set up a store. If you have staff, add them last.
Before You Begin
Make sure you're logged in to Smatyx and have selected a workspace. If you don't see any workspace, you may need to accept an invitation first. Check your email for an invite link from the account owner. See Account & Login for details.
If you created the Smatyx account, you're the owner with full access. Skip straight to Step 1.
If someone else set up the account and invited you, your access depends on your assigned role. You'll need permissions for menu management, store configuration, and (optionally) employee management. Missing access? Ask your account owner to check your role.
Step 1: Create Your Menu Items
Menu items are your individual dishes, drinks, sides, and extras. Create items before menus, because menus are built by selecting from existing items.
Go to All Apps > Settings > Items and click Add Item.
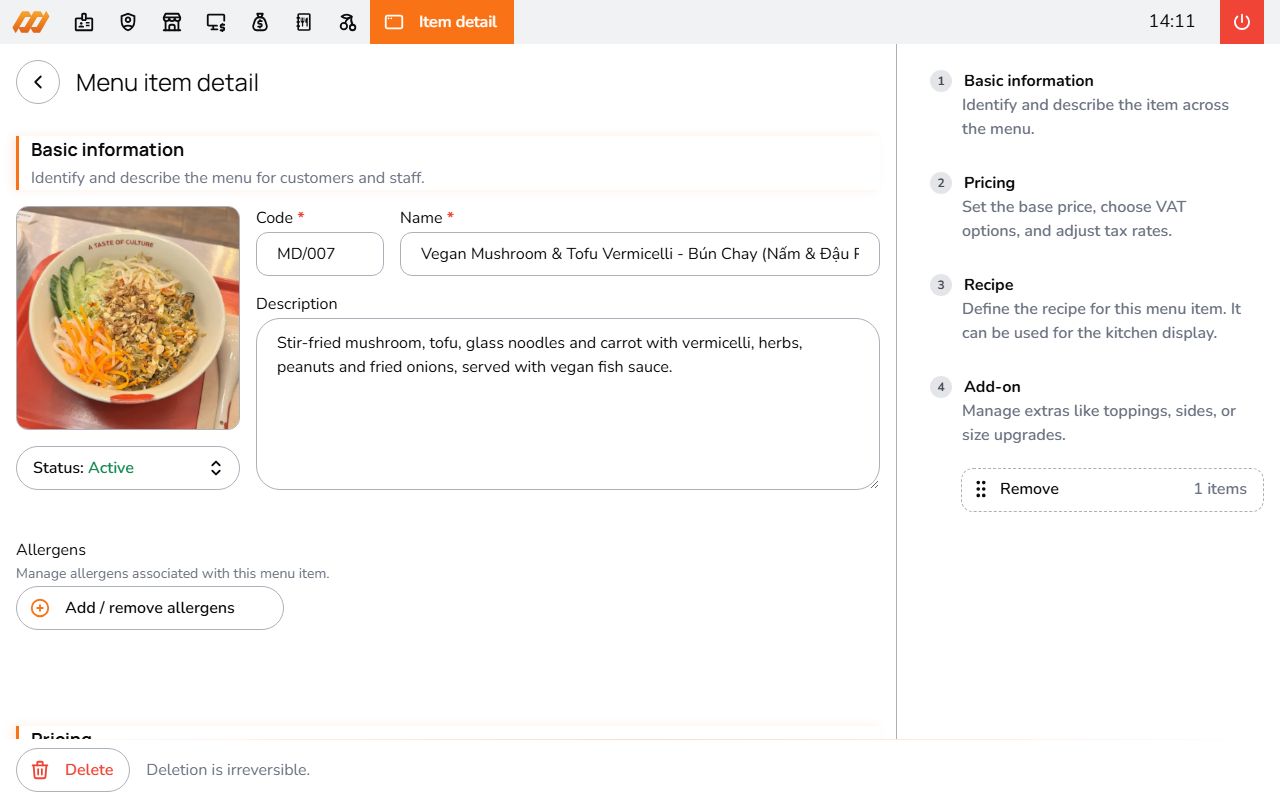
The essentials:
- Name - what the item is called (e.g., "Margherita Pizza", "Iced Latte")
- Code - auto-generated short identifier, customizable
- Price - selling price, VAT-inclusive by default
Optional but useful:
- Image - shows on the self-ordering menu when guests browse on their phone
- Description - visible to guests on self-ordering
- Allergens - mark allergens (gluten, nuts, dairy, sesame, and more). Clearly displayed to guests
- Add-on groups - let customers customize orders. Example: "Choose your size" with Small/Medium/Large at different prices, or "Extra toppings" with multiple selections. You can set min/max per group
- Recipe notes - prep instructions shown on the Kitchen Display. Helpful for new staff or complex dishes
- VAT rule - for different tax rates on dine-in vs take-away vs delivery. Create VAT rules from All Apps > Settings > VAT
Each item has a status: Active (visible and orderable), Draft (work in progress), or Inactive (temporarily hidden). Fine to leave items in Draft while setting up.
Step 2: Organize Items into Menus
Menus are what staff and guests actually see when placing an order.
Go to All Apps > Settings > Menus and click Add Menu. Give it a name like "Main Menu", "Lunch Menu", or "Bar Menu".
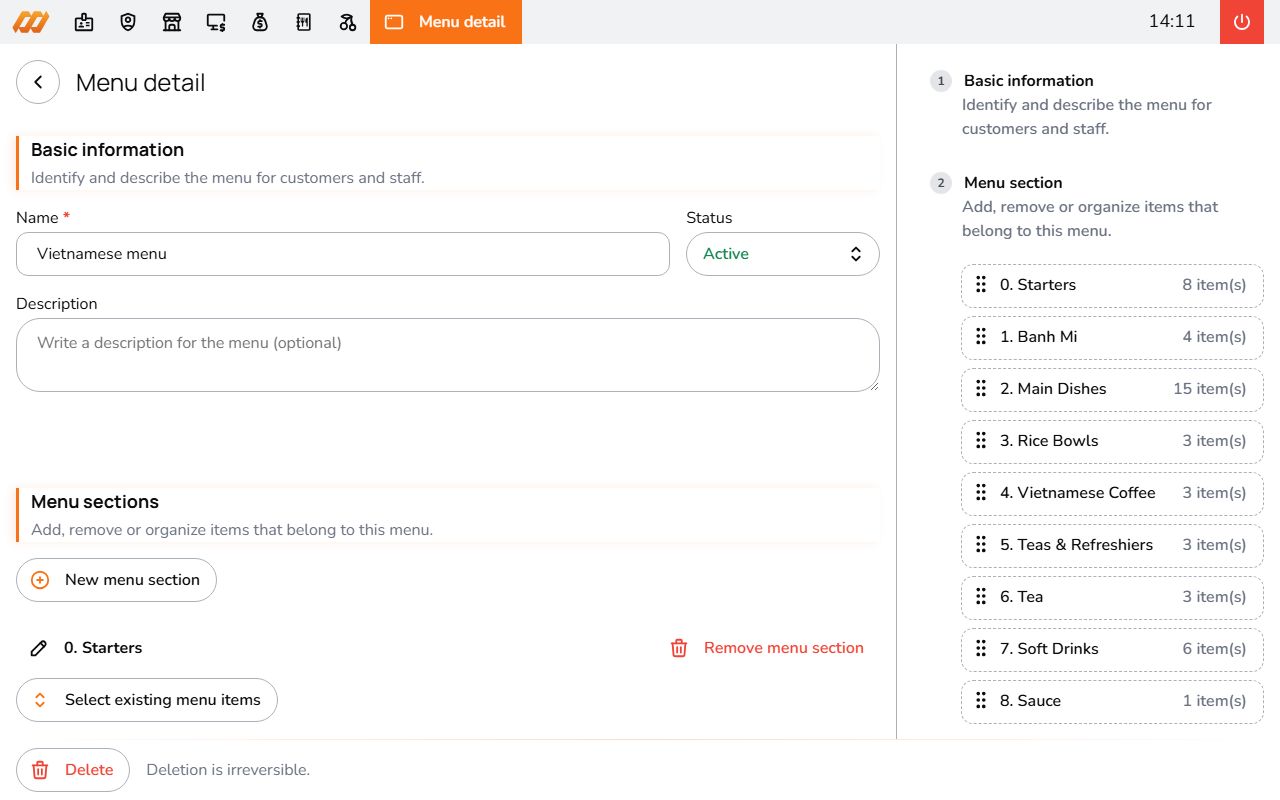
Inside a menu, organize items into sections (categories). A typical setup:
- Starters - Spring rolls, Soup of the day, Bruschetta
- Mains - Margherita Pizza, Grilled Salmon, Pad Thai
- Drinks - Iced Latte, Fresh Orange Juice, House Wine
- Desserts - Tiramisu, Chocolate Cake
You can have multiple menus for different purposes. A full dinner menu, a shorter lunch menu, a simplified self-ordering menu. Each operates independently.
Like items, menus have states: Active, Draft, and Inactive. Only active menus are available for ordering.
Step 3: Set Up Your Store
A "store" (sales point) represents a physical location where orders are taken. Even with one restaurant, you need at least one store before using the POS.
Go to All Apps > Settings > Stores and click Add Store.
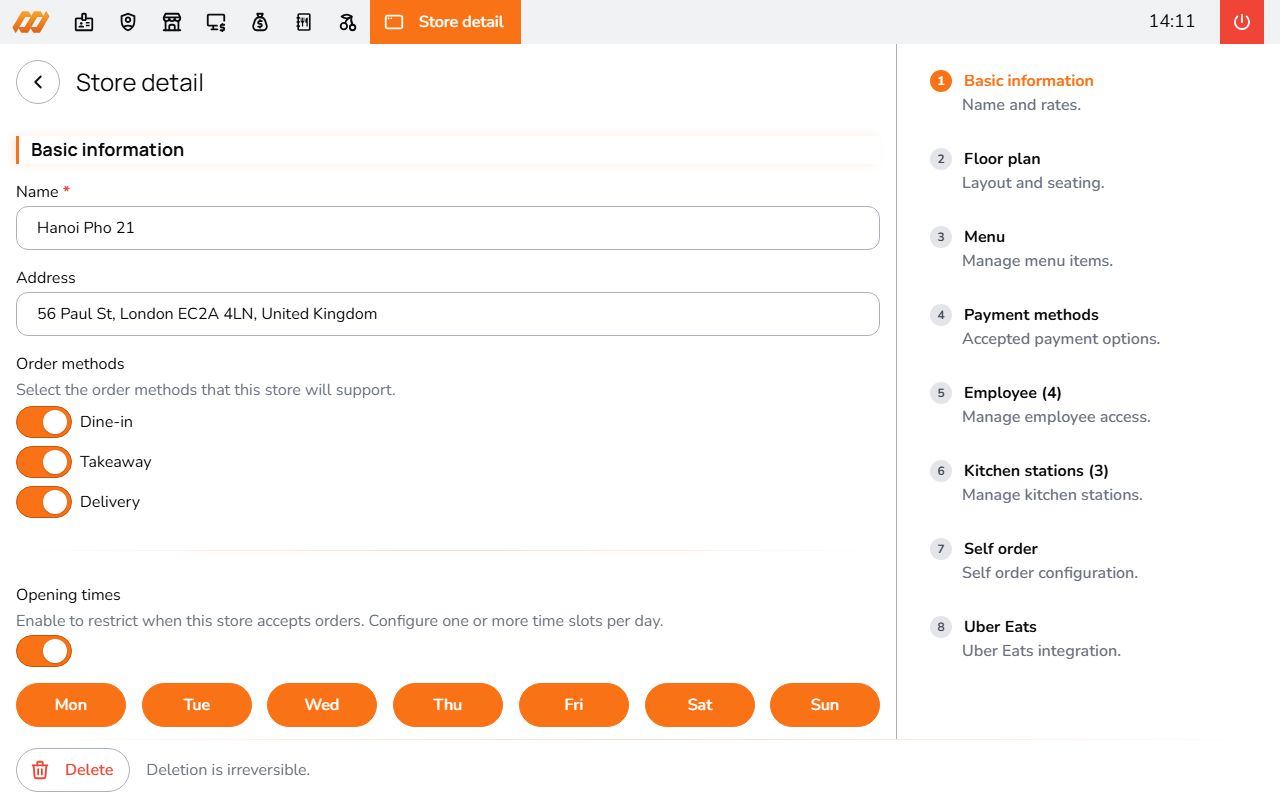
Basic info:
- Name - your restaurant or location name
- Address - the physical address
Order methods - which types of orders this store accepts:
- Dine-in - guests eating at the restaurant
- Take-away - orders picked up by the customer
- Delivery - orders delivered to the customer
Menu assignment - select which menus are available at this store. You can restrict menus to certain order methods (e.g., smaller menu for delivery only) or time slots (e.g., lunch menu 11am-3pm).
Payment methods - enable what you accept:
- Cash
- Bank transfer
- Momo
- VNPay
- Dojo (card terminal)
Optional:
- Opening hours - outside these hours, the store won't accept new orders
- Kitchen stations - multiple prep areas (grill, cold section, bar) so orders route to the right screen
- Floor plan - table layout for dine-in service
- Employees - assign staff to this location
Once saved with at least one active menu and one payment method, you're ready to open a shift and start taking orders.
Step 4 (Optional): Add Your Team
If you're the only one using Smatyx, skip this. The owner account has full access.
For staff, the process is: create roles first, then add employees.
Create Roles
Go to All Apps > Settings > Roles and click Add Role.
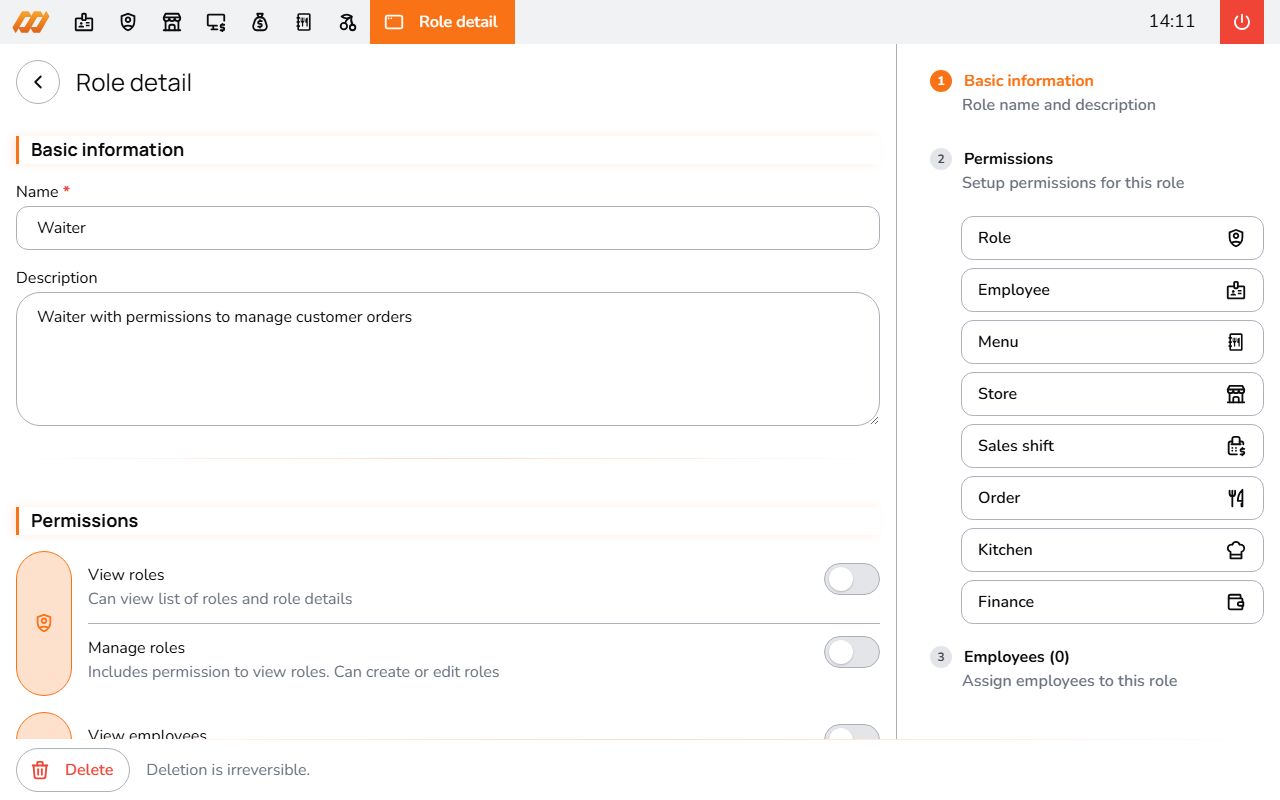
Permissions are organized into groups:
- Menu - view and edit menu items and menus
- Store - view and manage store settings
- Orders - take orders and view order history
- Payments - process and view payments
- Sales shifts - open and close shifts
- Kitchen display - use the KDS
- Finance - view and manage income and expenses
- Employees - view and manage staff records
- Roles - view and manage role definitions
Each permission can be Active (full access), Location-restricted (limited to assigned locations), or Inactive (no access).
Typical setup: a "Cashier" role with order and payment permissions, a "Kitchen Staff" role with just KDS access, and a "Manager" role with broader access.
Add Employees
Go to All Apps > Settings > Employees and click Add Employee. Fill in their details and assign roles.
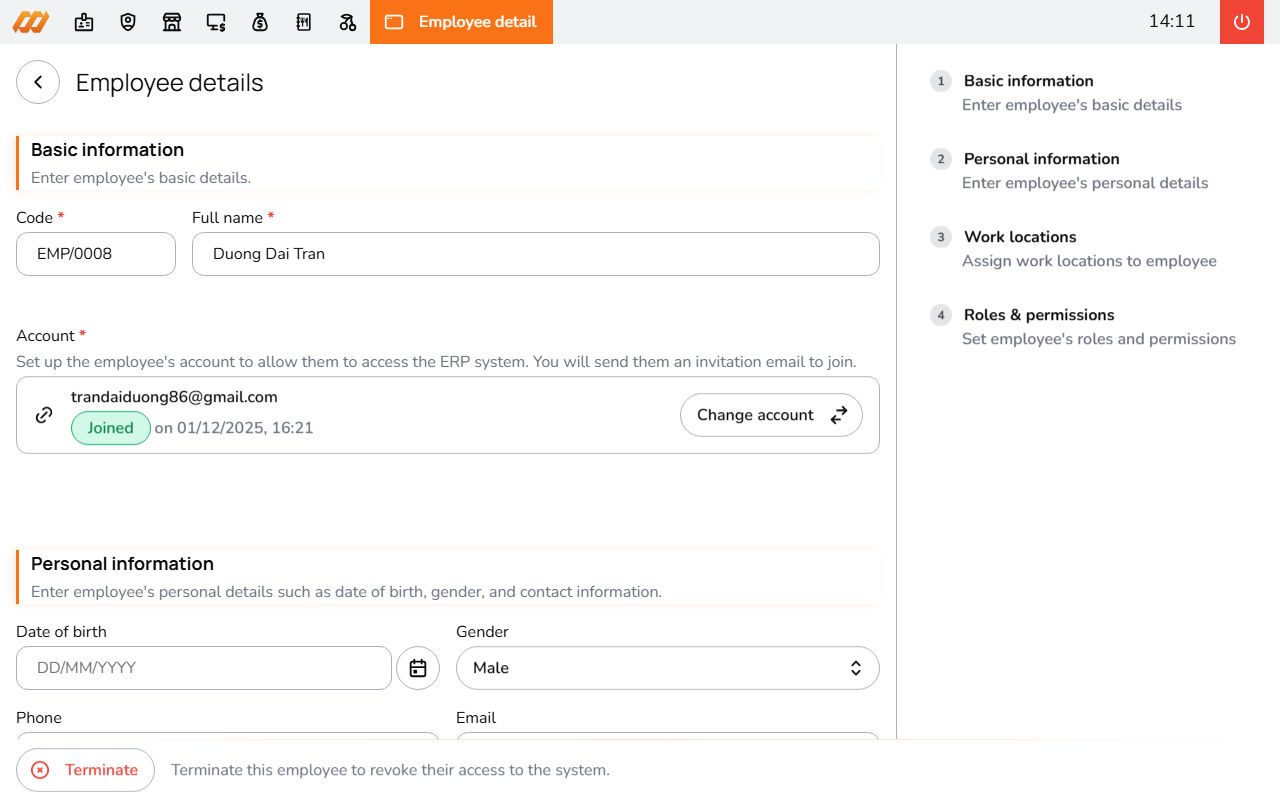
Smatyx sends an email invitation automatically. The employee clicks the link, creates their password, and they're in. Status changes from Not Invited to Invited to Joined.
You can also assign employees to specific locations, which works with location-restricted permissions.
Next Steps
- POS Setup - open shifts, take orders, process payments
- Kitchen Display System - set up kitchen screens
- Self-Ordering - enable QR code ordering
- Reporting - explore sales and performance data