Order Flow
Who is this article for?
Account owners, or team members with:
- Take orders
Set permissions in All Apps > Settings > Roles.
This is how a typical order works in Smatyx POS, from start to finish.
Before you start
You need to be in the Sales operation module with a store selected and a shift joined:
- Go to All Apps > Sales operation
- Select your store using the store selector in the app bar
- Join or open a shift (see Shift Management)
If no store is selected, the system shows "No store selected" and won't let you proceed.
1. Create an order
- Go to POS
- Pick the order method: Dine-in or Take-away
- For dine-in, select a table from the list or floor plan
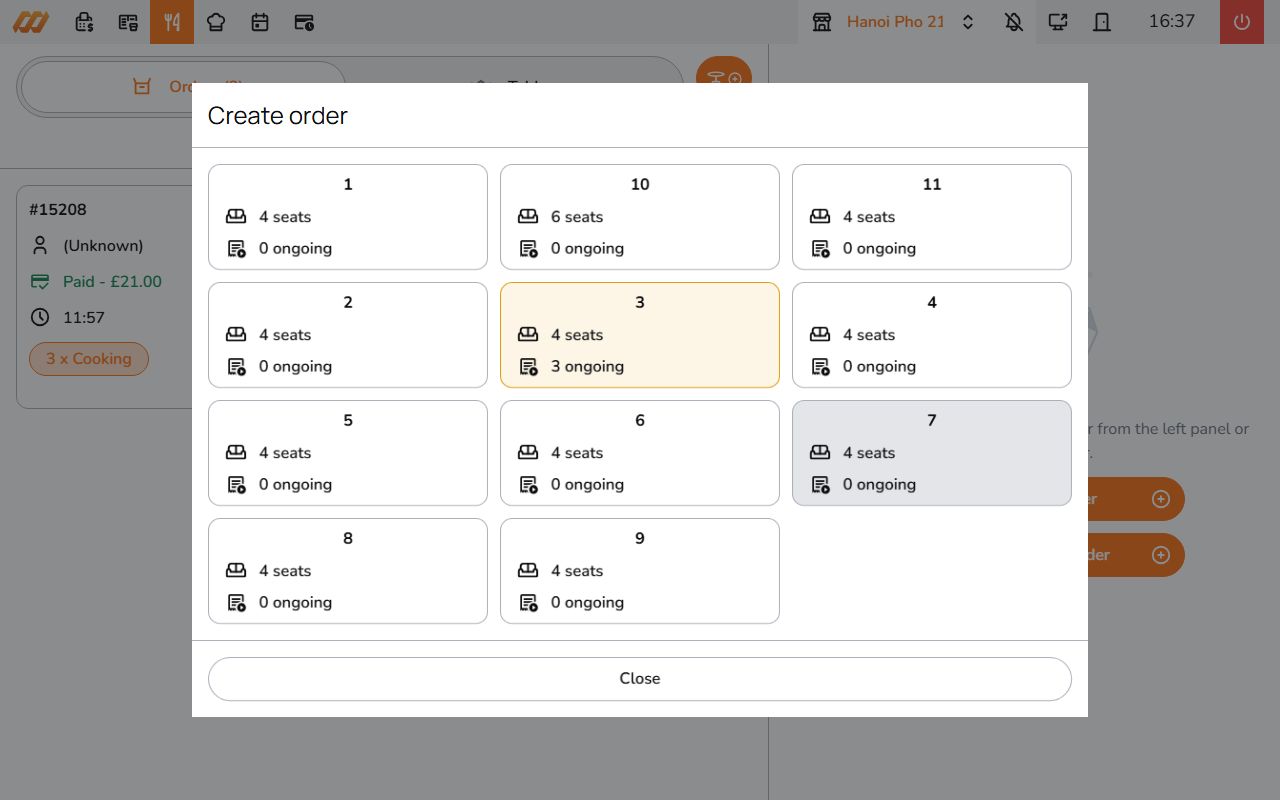
If your store requires customer info (name, phone, email), a dialog appears before you can continue.
2. Add items
Browse the menu and tap items to add them to the order.
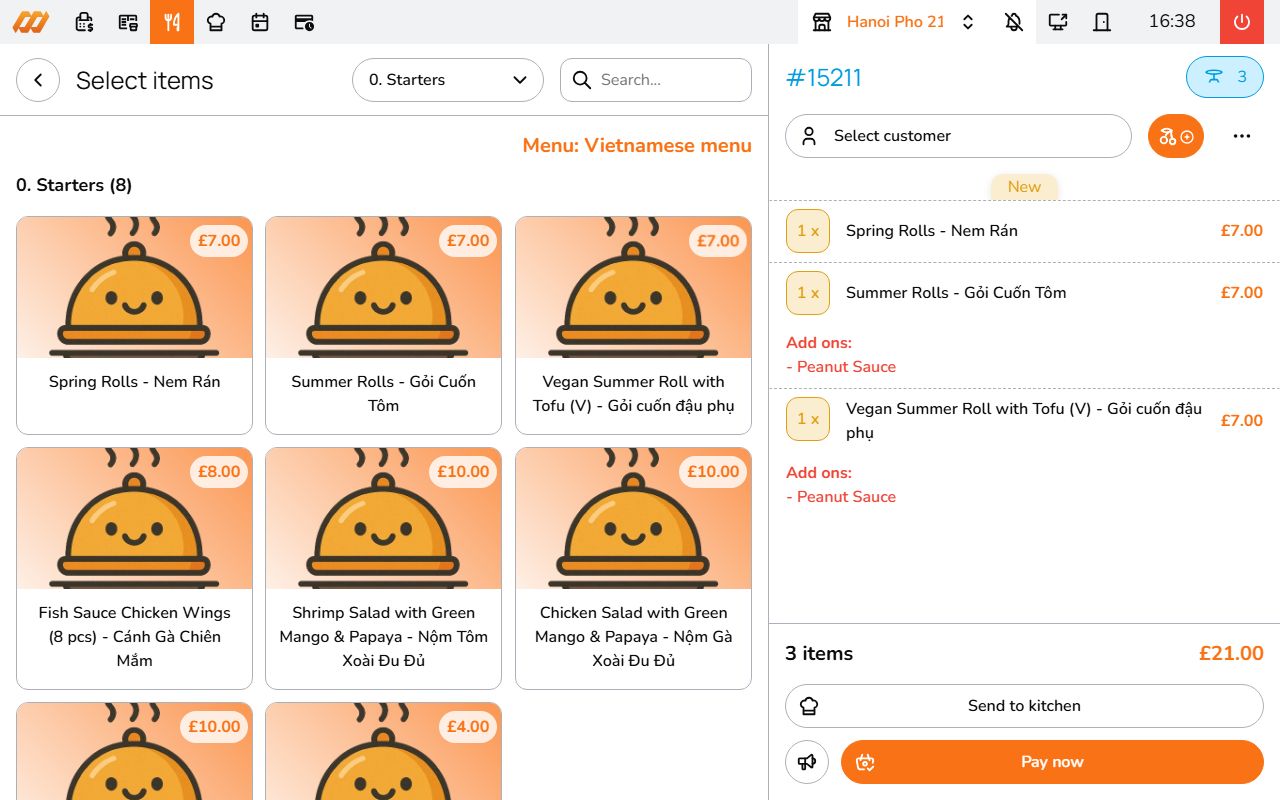
- If an item has add-on groups (sizes, toppings, cooking preferences), a popup lets you select options
- Tap an item in the cart to add a note (e.g., "no onions", "extra spicy"). Notes show up on the kitchen display
3. Send to kitchen
Tap Send to kitchen to confirm. Items go to the kitchen display immediately. If you have multiple kitchen stations, each item routes to the right station automatically.
4. Surcharge and discount
Before paying, you can add a surcharge or discount to the order:
- In the payment screen, tap Edit Surcharge and Discount
- Enter a discount as a fixed amount or percentage. You can also apply a voucher code
- Enter a surcharge as a fixed amount or percentage
- The dialog shows a live preview of the updated total
- Tap Save
5. Payment
When the customer is ready to pay, tap Pay now and select a payment method (cash, card, bank transfer, Momo, VNPay).
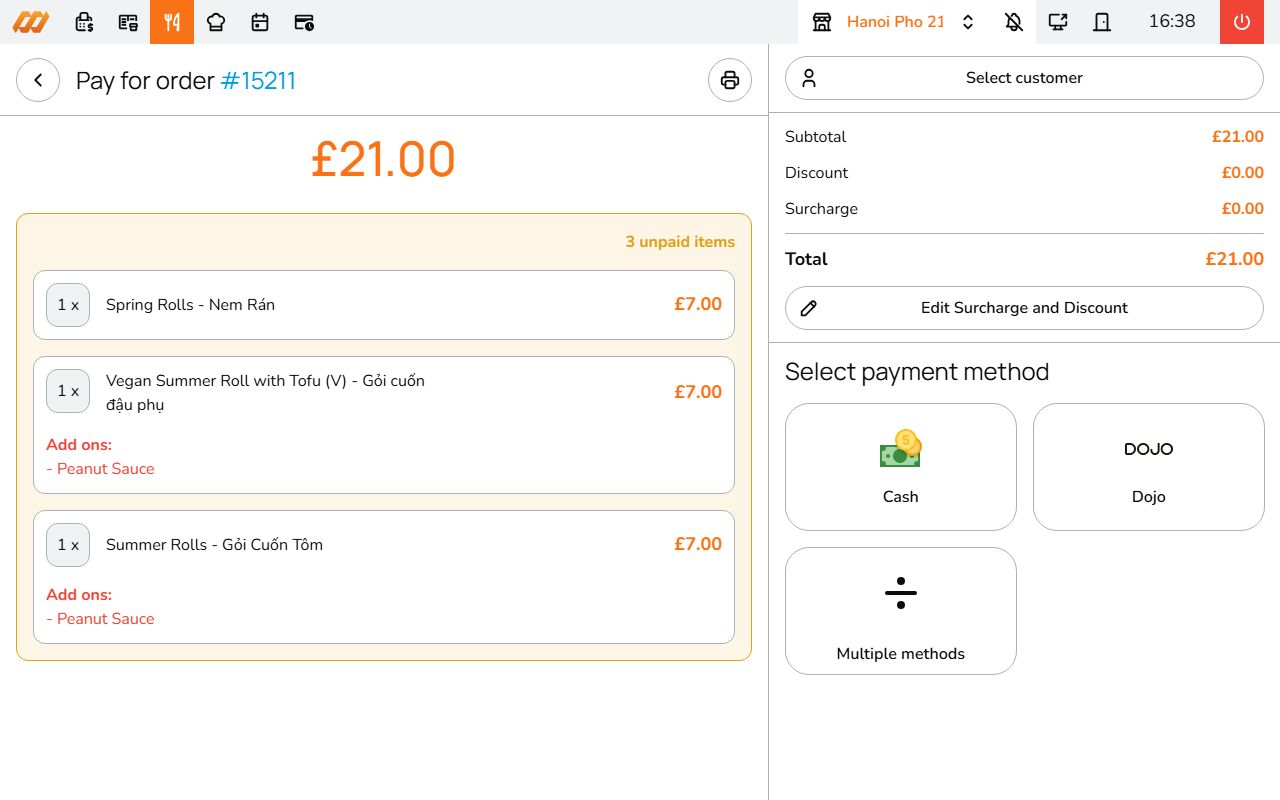
To split the bill, see Split Payments.
6. Adjust the order
Need to make changes? Tap the three-dot menu (more options) on the order:
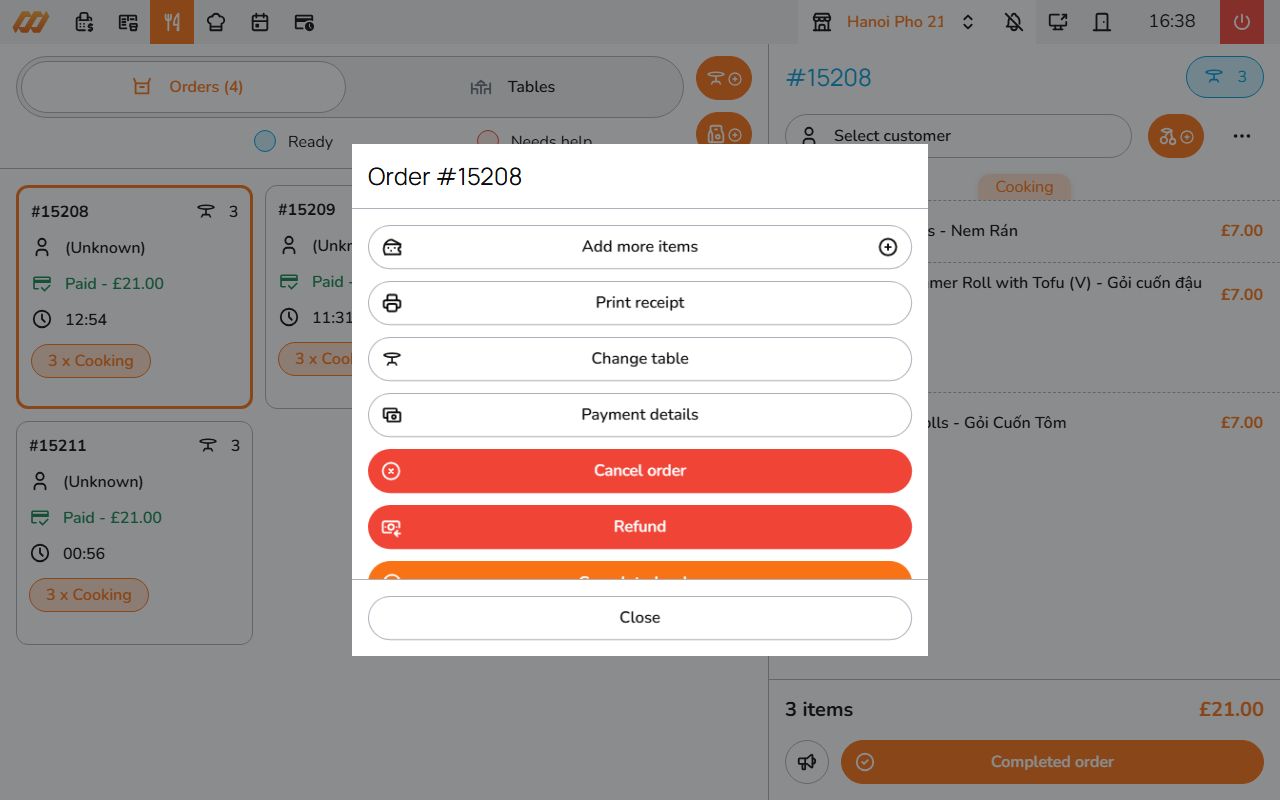
- Add more items - add extra items to an existing order. New items go to the kitchen as draft
- Change table - move the order to a different table
- Print receipt - print the current receipt
- Payment details - view payment info
You can also tap individual items in the cart to change their status:
- Draft items - cancel or adjust quantity before sending to kitchen
- Sent/cooked items - cancel individual items
- Served items - mark as returned
7. Complete the order
If the order is fully paid, tap Completed order in the three-dot menu to close it.
8. Cancel an order
Tap the three-dot menu and choose Cancel order (red button). This cancels the entire order. You can cancel at any point regardless of payment or kitchen status.
9. Refund
If the order has been paid, the Refund option appears in the three-dot menu. See Refunds for details.
Order states
- Draft - order is being built, not sent to kitchen yet
- Ongoing - sent to kitchen, being prepared
- Done - completed
- Cancelled - order was cancelled